4D InSpec Surface Gauge
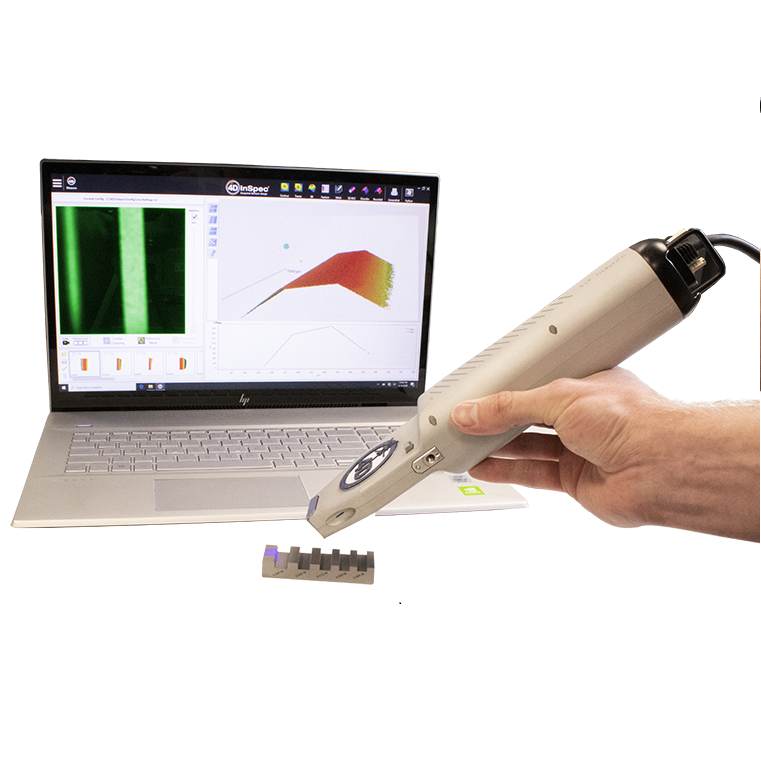
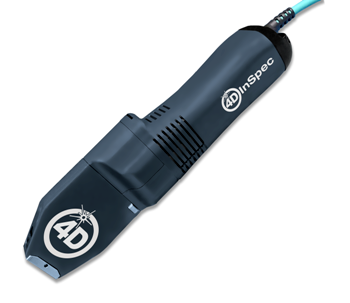
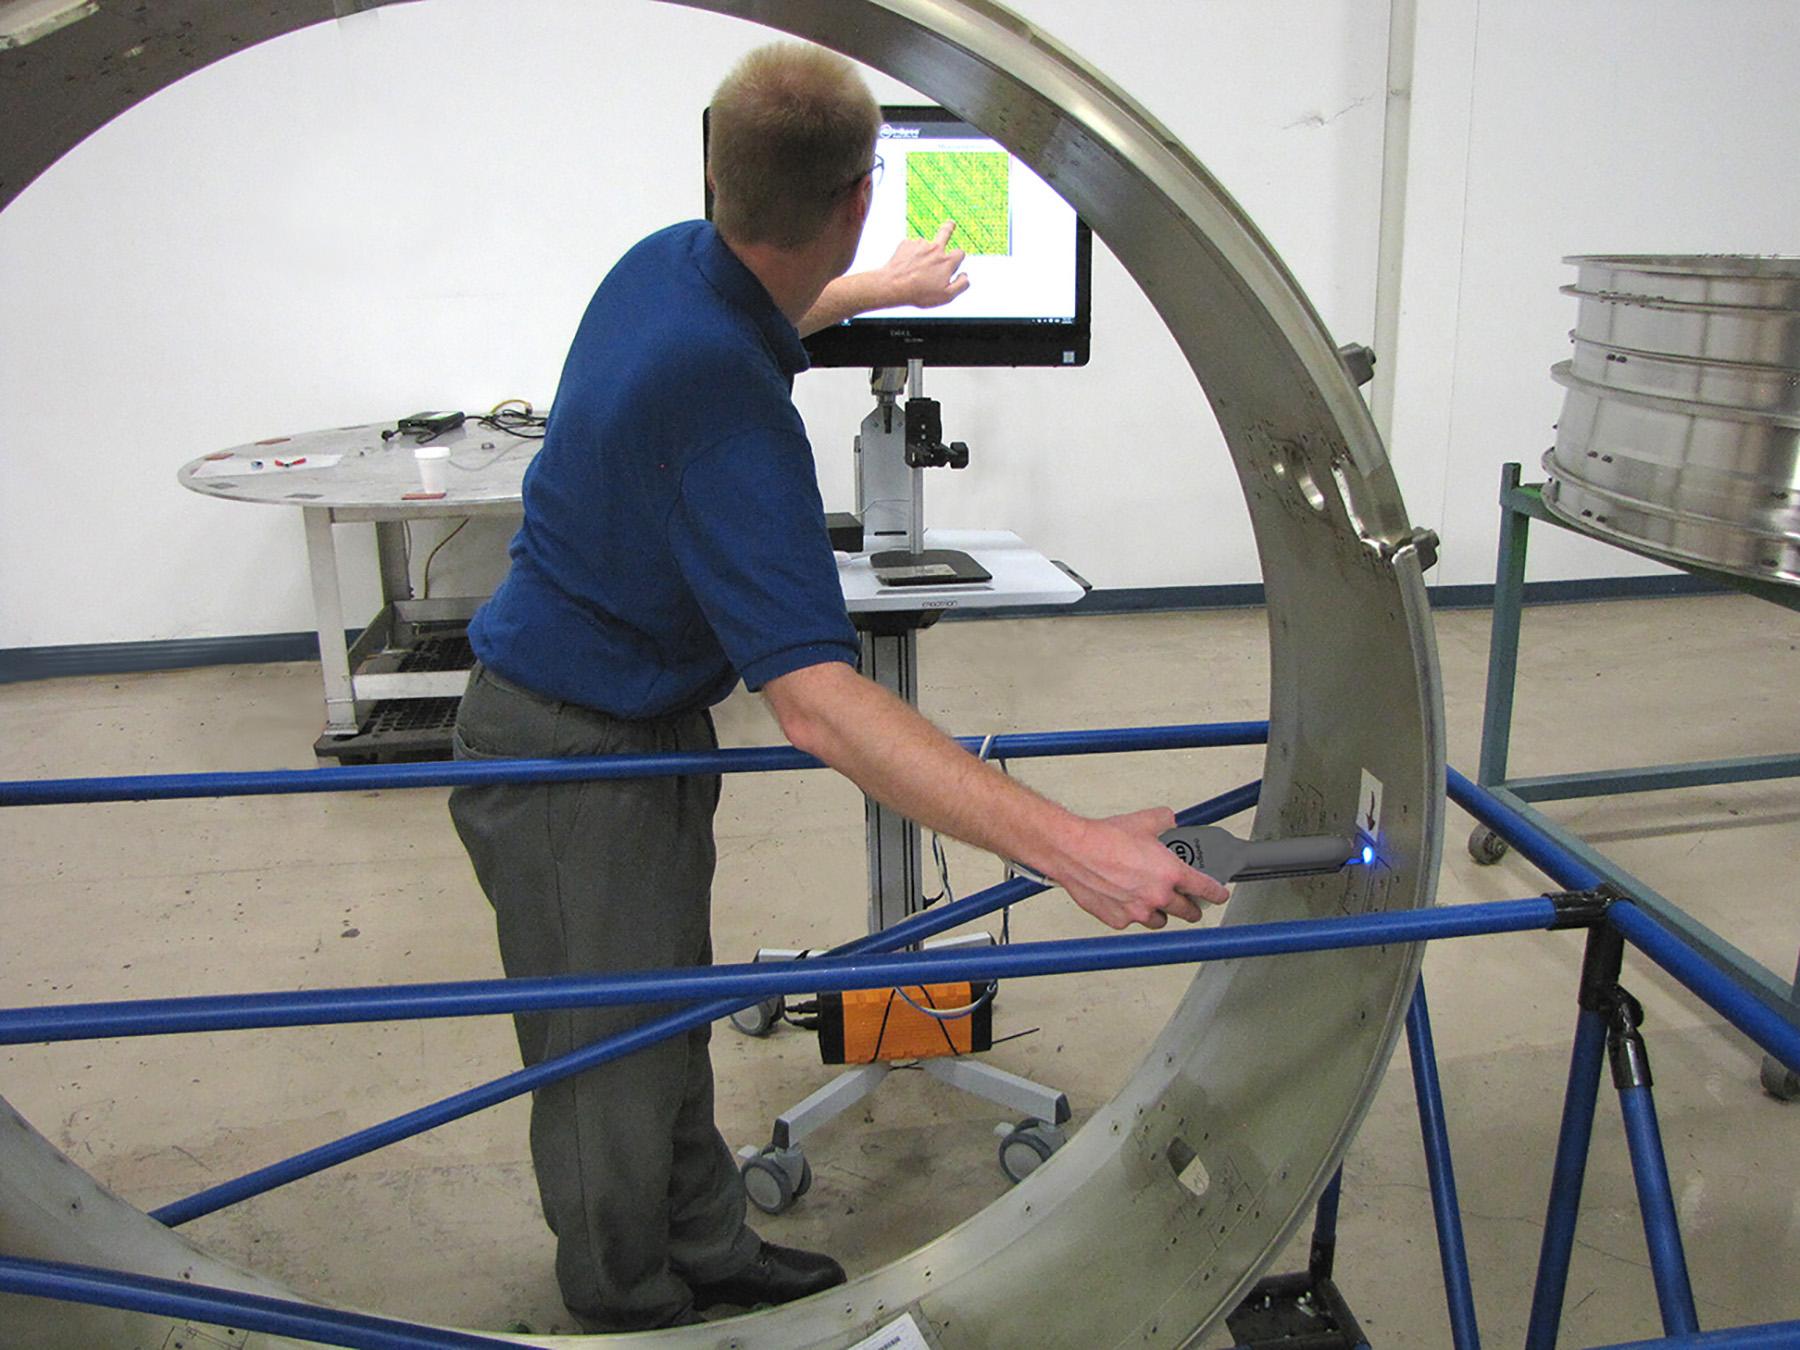
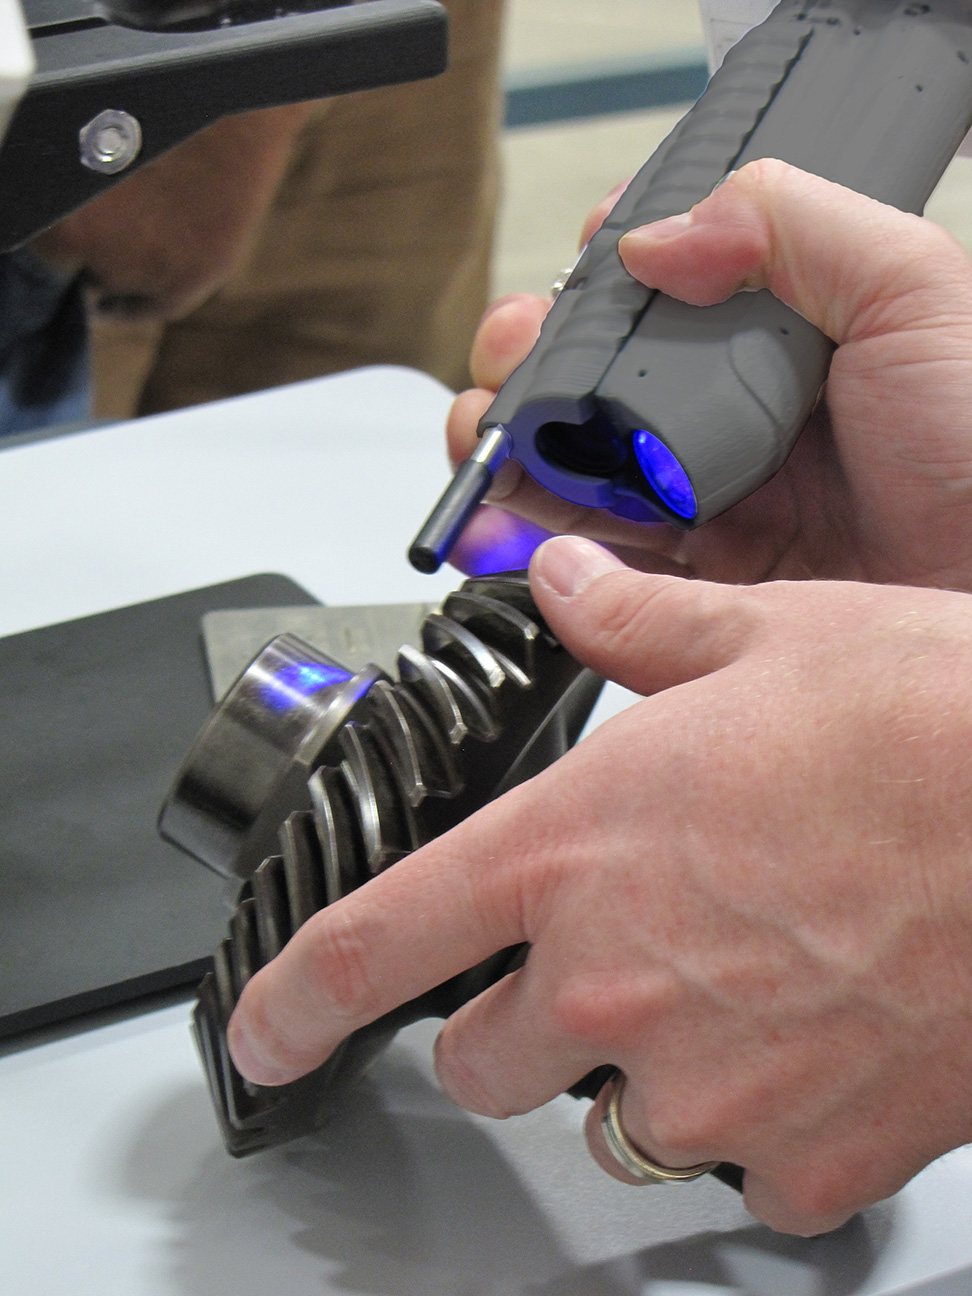
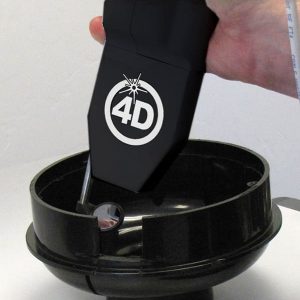
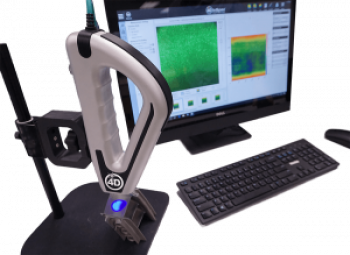
The 4D InSpec Surface Gauge is the frst handheld, precision instrument for non-contact measurement of surface features and defects. With micrometer-level resolution, portability, affordability and ease-of-use, 4D InSpec puts high resolution measurement on the factory floor, in machine shops and deployed environments. 4D InSpec brings 3D measurement to the factory floor, to quantify pits, scratches, nicks, dents, bumps, porosity and other features from 0.0002” to 0.1” (5 µm–2.5 mm) deep or tall. 4D InSpec is far more repeatable and accurate than visual comparison techniques The 4D InSpec can be handheld to access tight corners or to sample large surfaces. An optional fold mirror accessory lets the system function like a borescope to access blind holes and inner diameters. One-button operation and immunity to sensor movement make it | 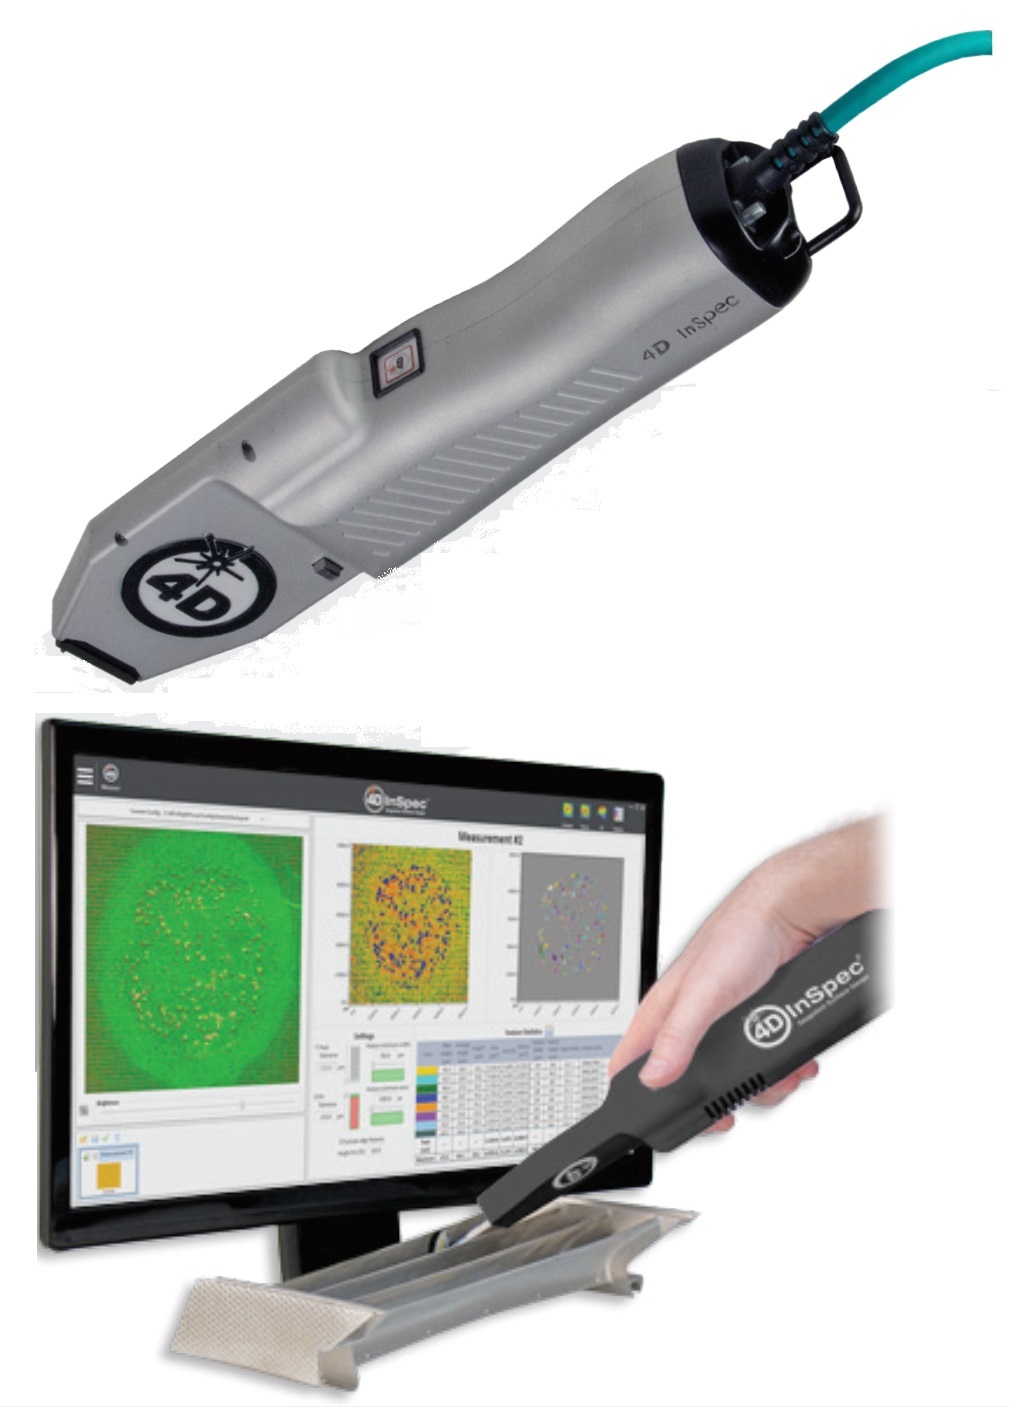 | 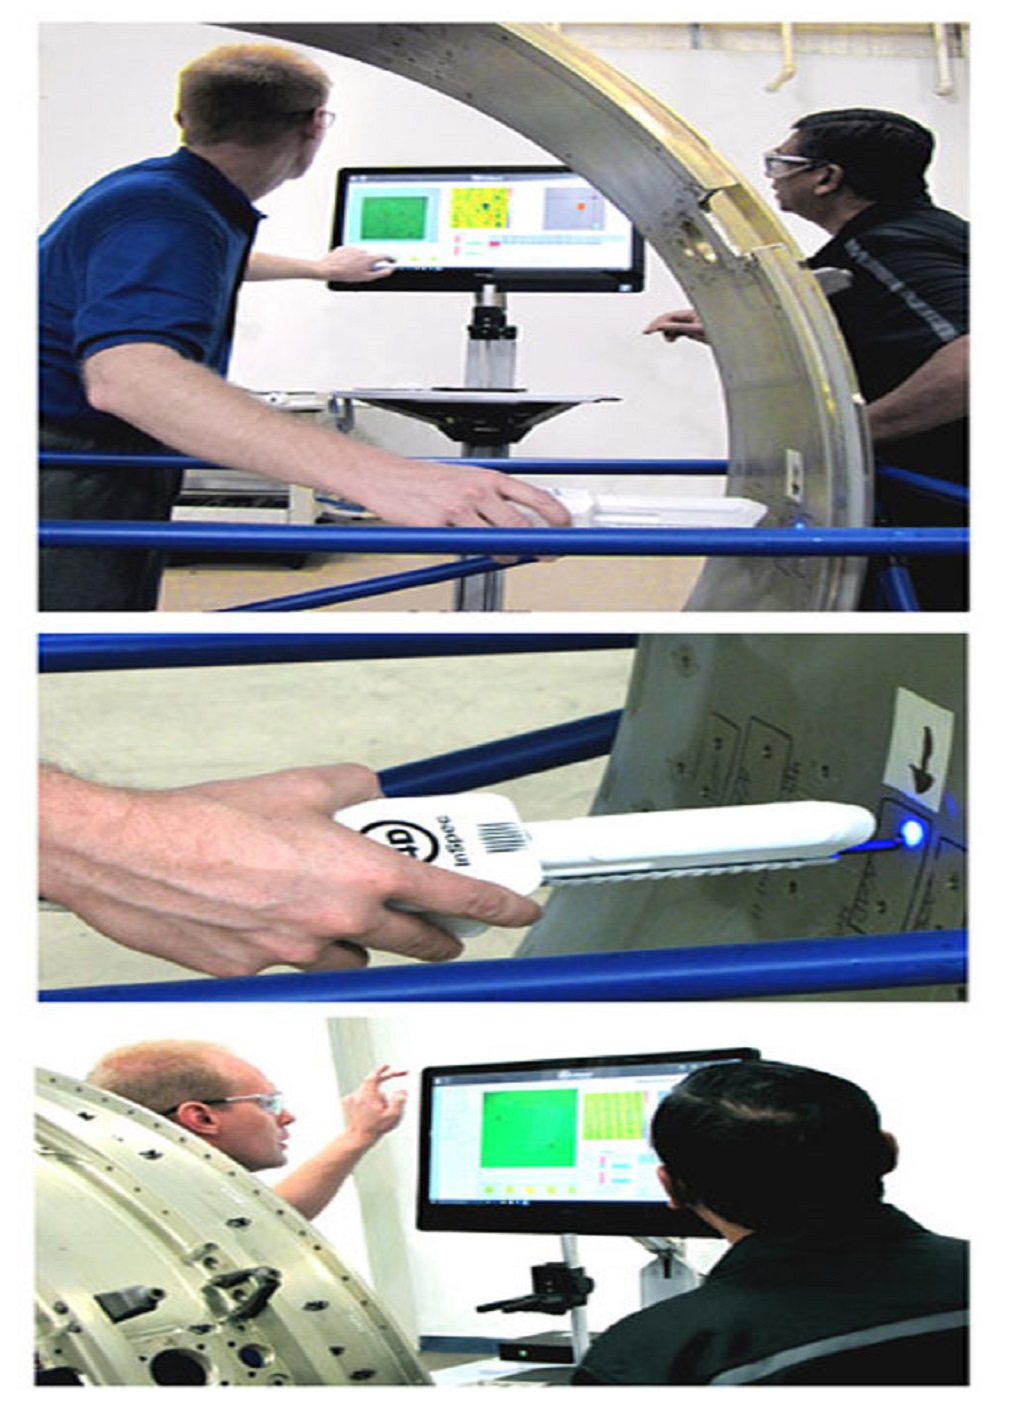 |
In a workstation confguration 4D InSpec makes it fast and easy to obtain repeatable quality control data. An intuitive, touchscreen interface handles setup, operation,
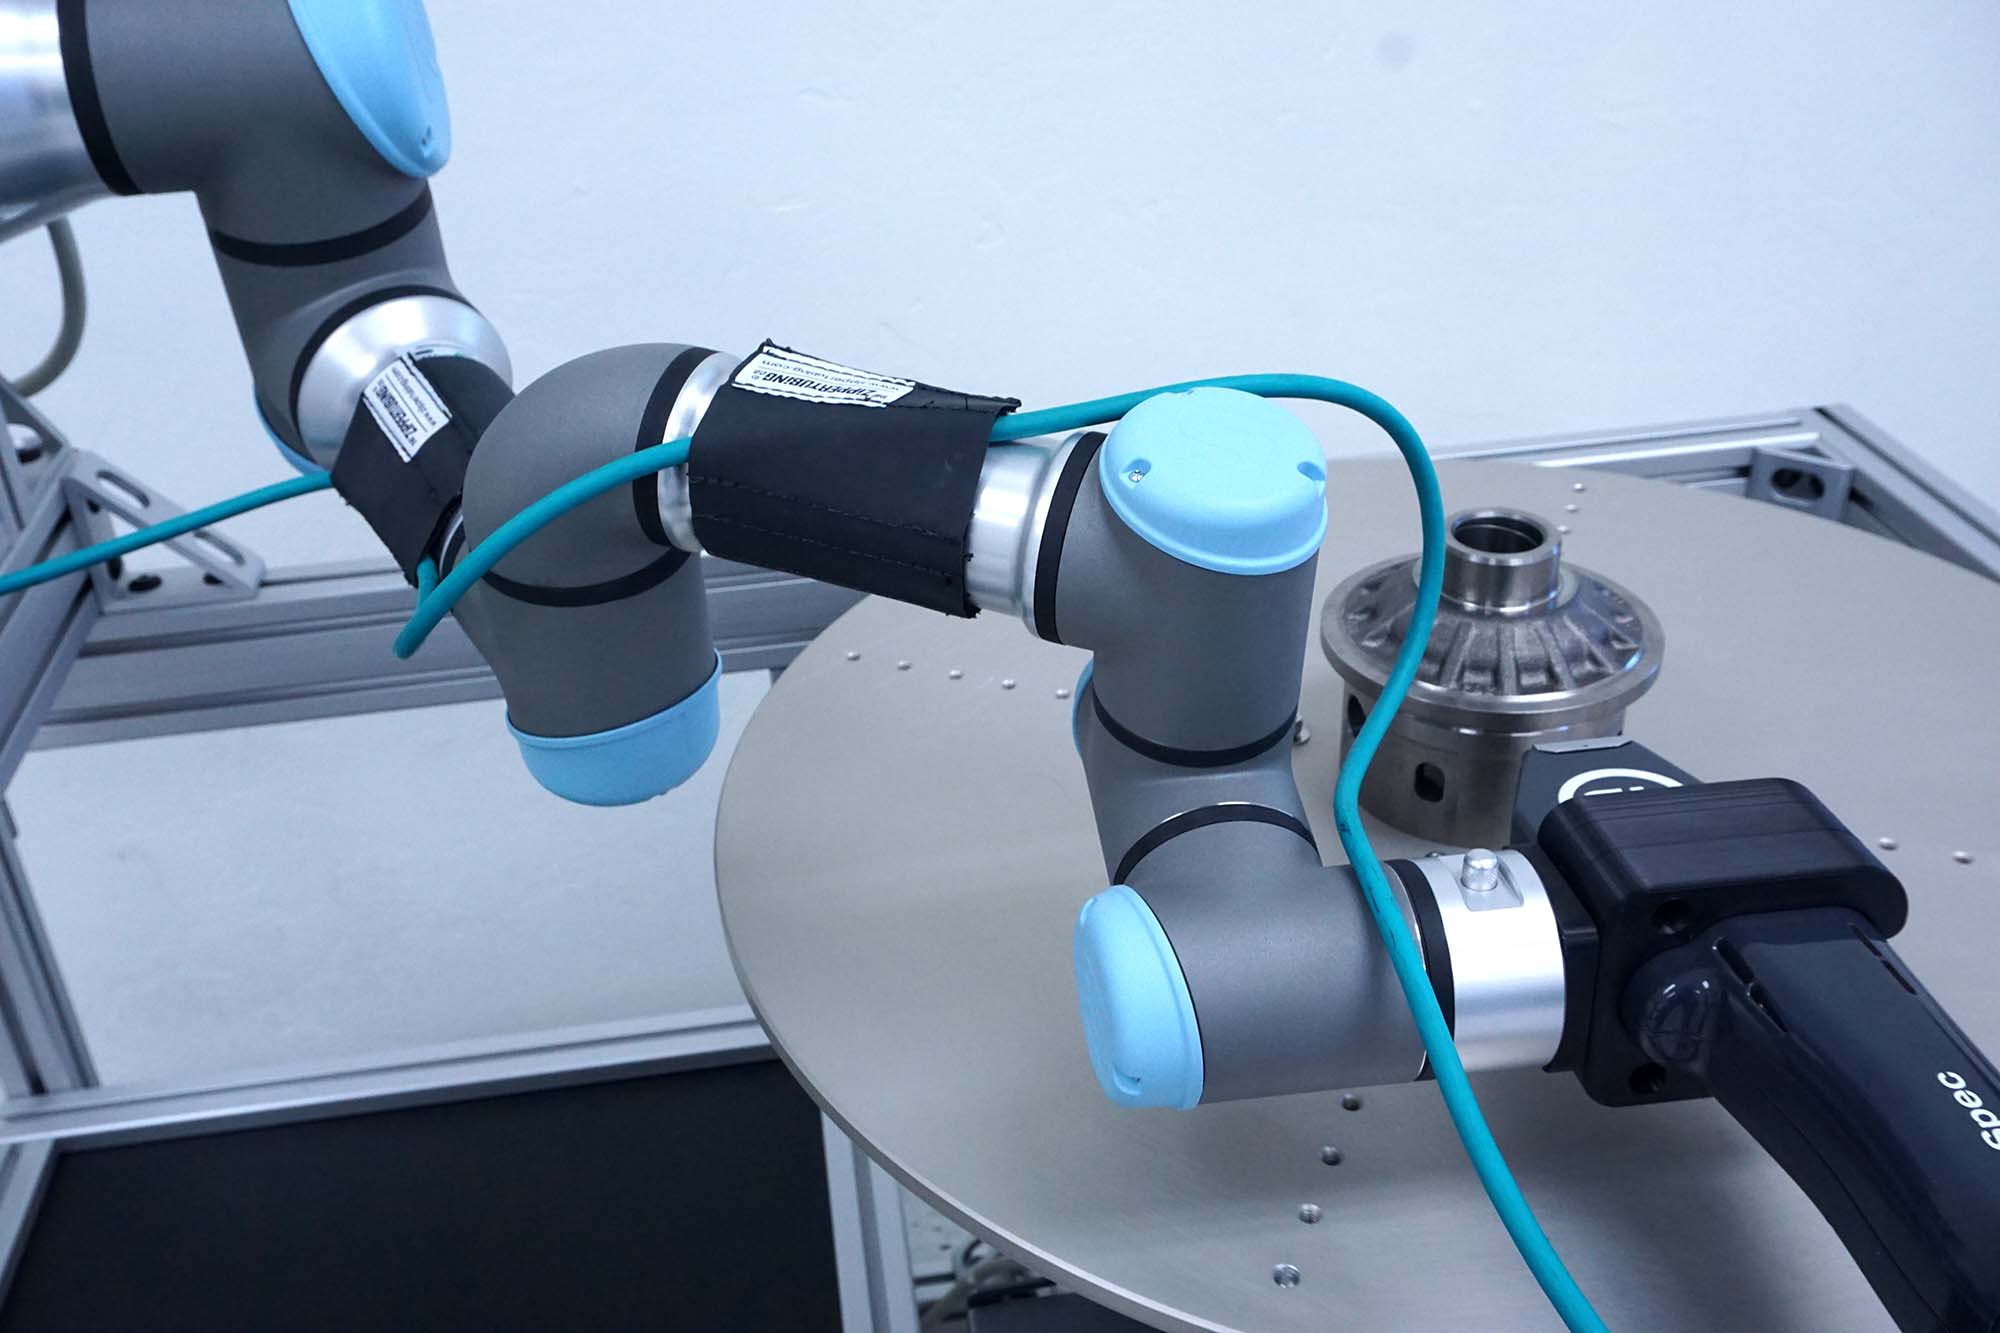
analysis and report generation. The 4D InSpec can also be mounted on a robotic manipulator for fully automated measurements of complex components
Highly Features
- Instant 3D Surface Measurement
- Measure Defects and Features from 4 µm–2.5 mm Deep
- Measure Large Components Directly—No Replication Needed
- Easy Measurement of Complex Geometries
- Handheld, Workstation or Robotic Operation
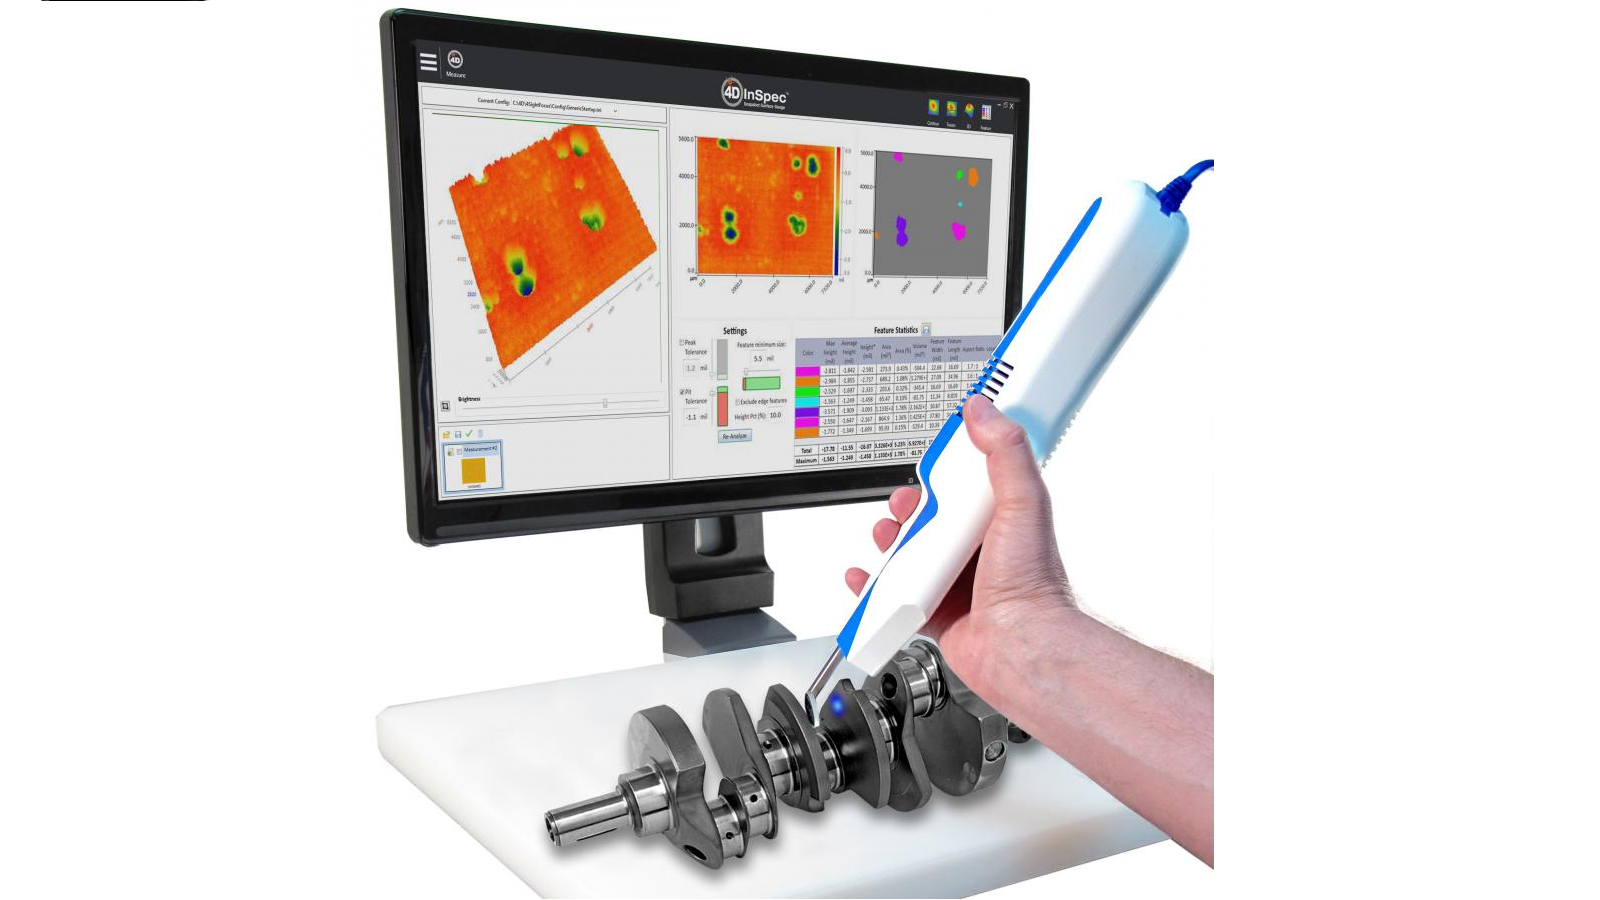 | 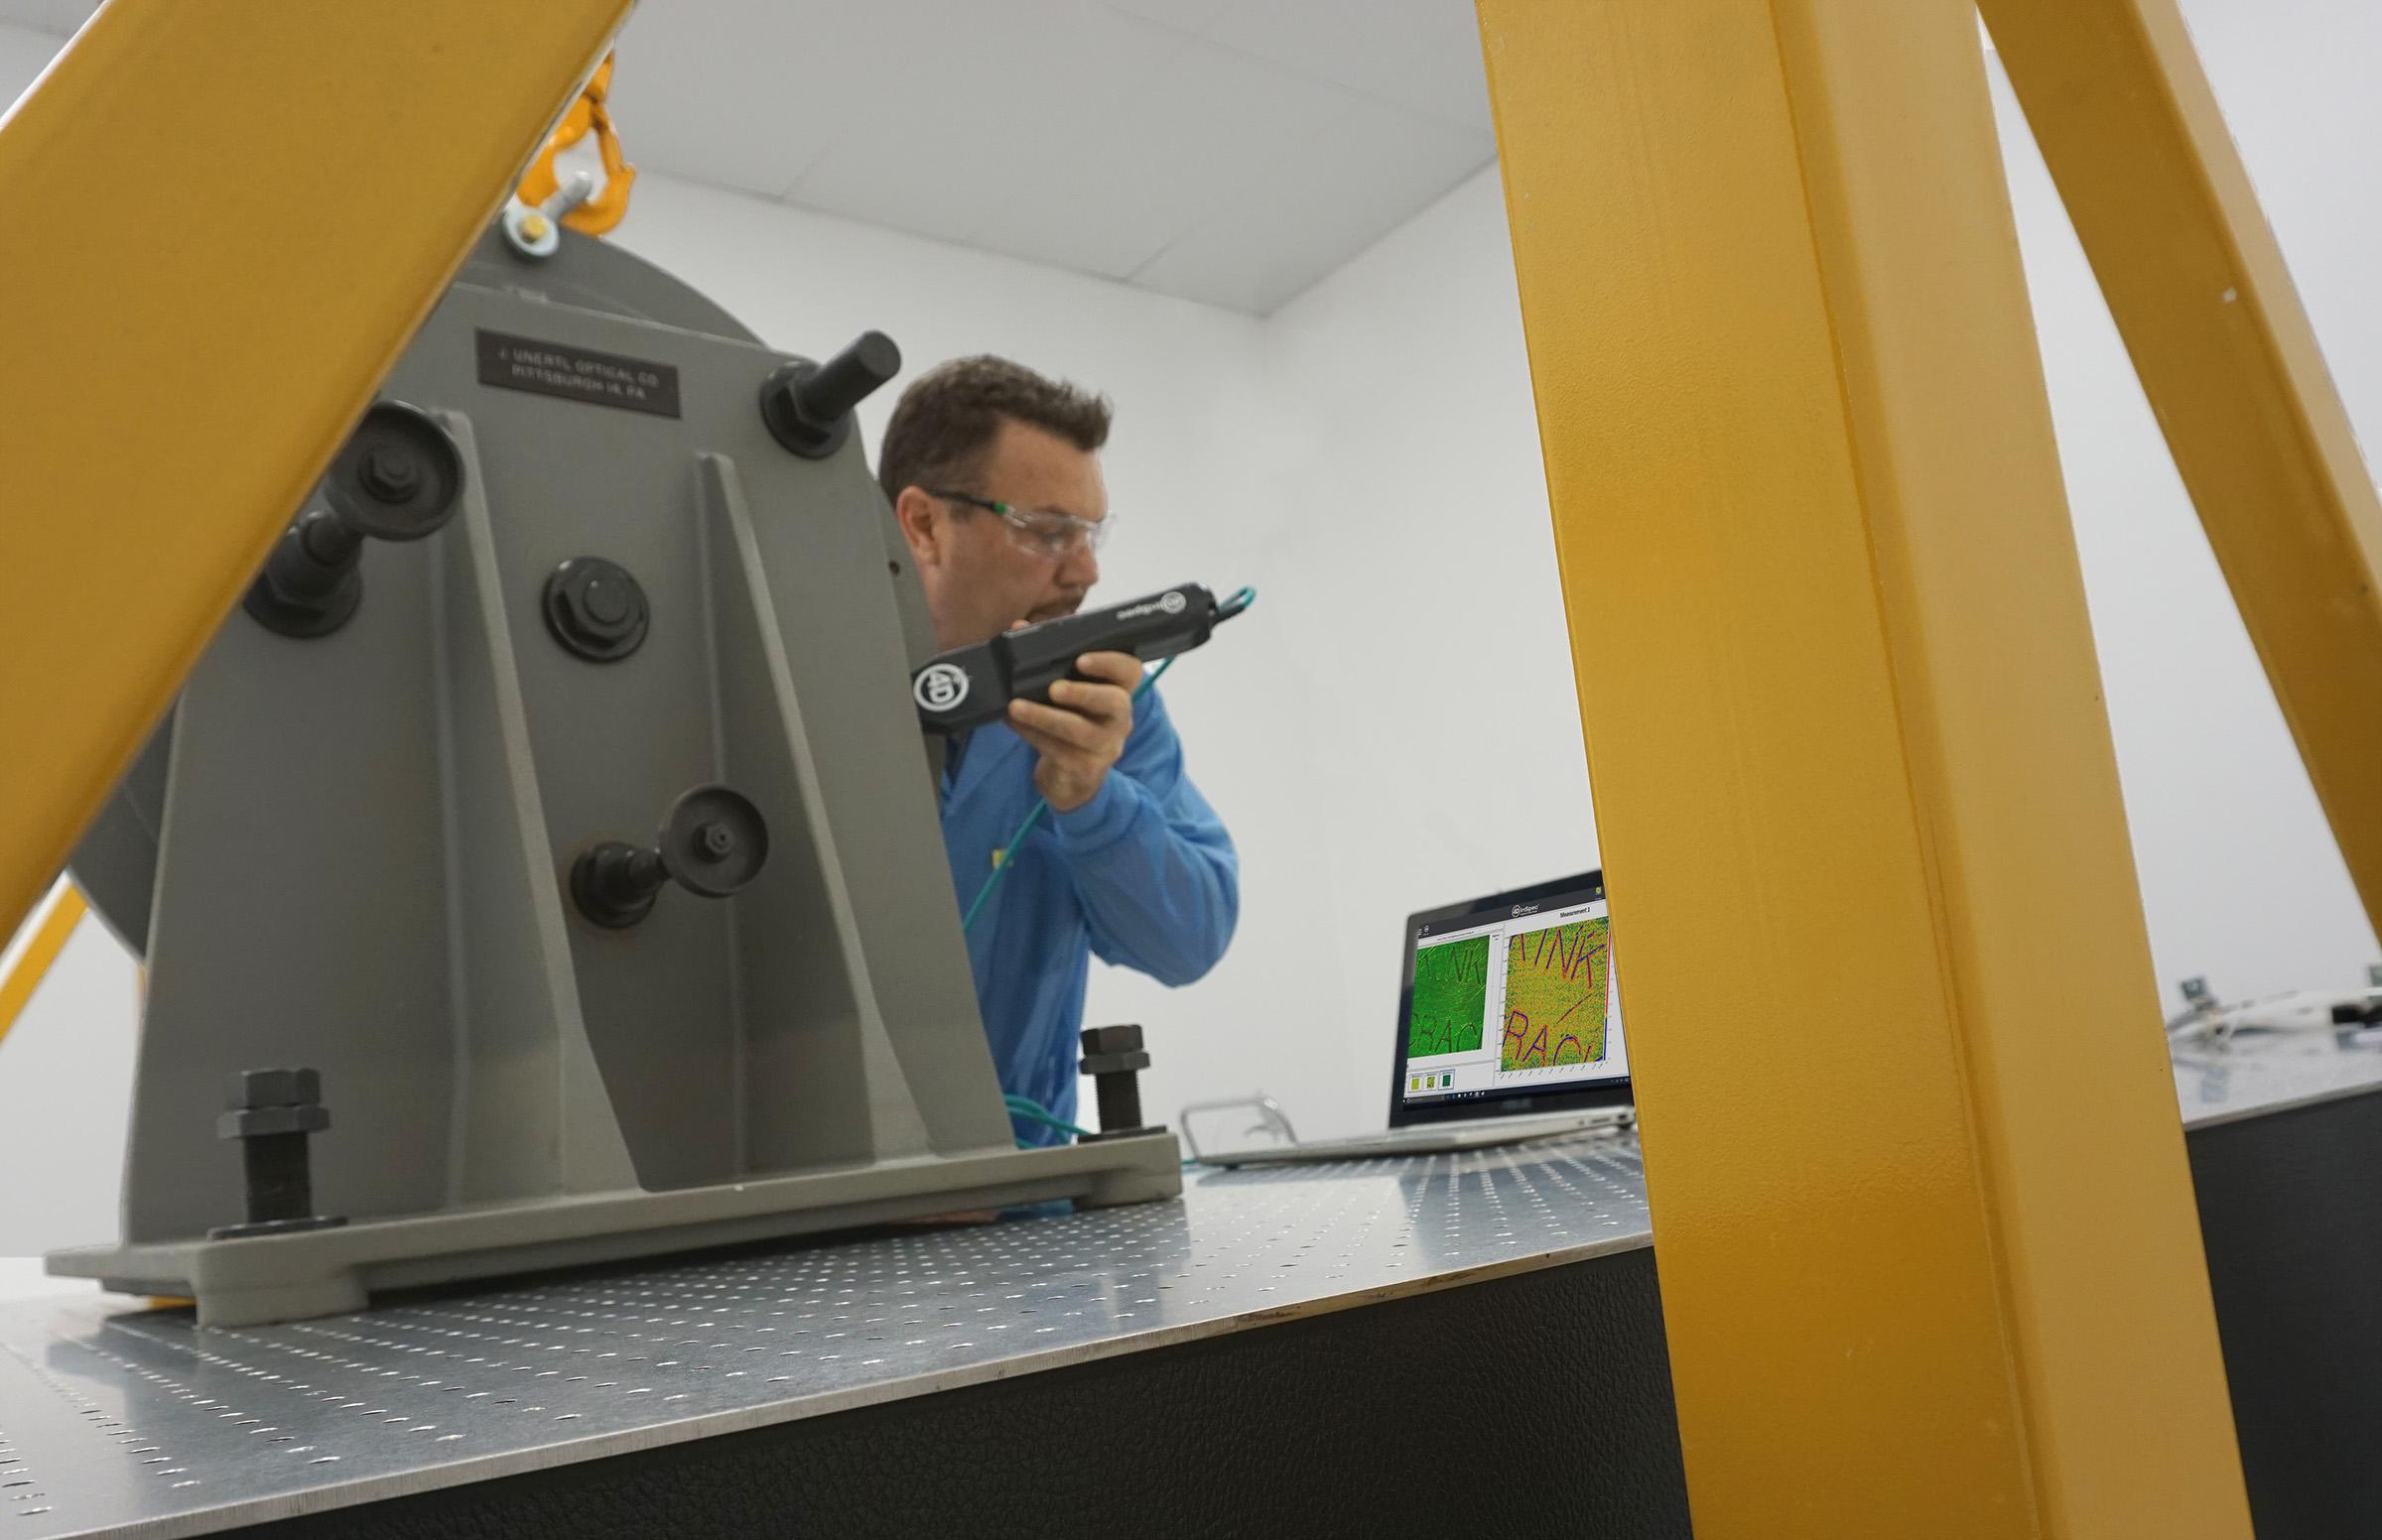 |  |  |
| Small workpiece | Large sample | Automation | Portable |
Increases yield 20-40% in machine shops and rework centers.
By measuring a part’s nominal defect features right up to the line of the specification, customers find that they are able to pass more parts, and rework many parts that a fingernail test, comparator, or pocket stylus would have failed. 20%-40% improvements in yield are typical reported figures from 4D InSpec purchasers.
Analysis Software
4D InSpec® analysis software provides one-button measurement acquisition and easy to use analysis to make the most of the 4D InSpec Surface Gauge. Its straightforward design, touch-screen interface and drag-and-drop operation make the software easy to use in a production environment.
The 4D InSpec software is full-featured, but easy to use. Information is presented in a clear format, and steps are included in logical groups and functions.
Acquiring measurement data is easy using the live view in 4D InSpec’s software.
You can see what the instrument sees using real time video in the Live View area. Grey, green, yellow and red (false) colors on the screen indicate when you can obtain a good measurement. By dragging a box, you can mask the field of view to measure just in your area of interest.
 | 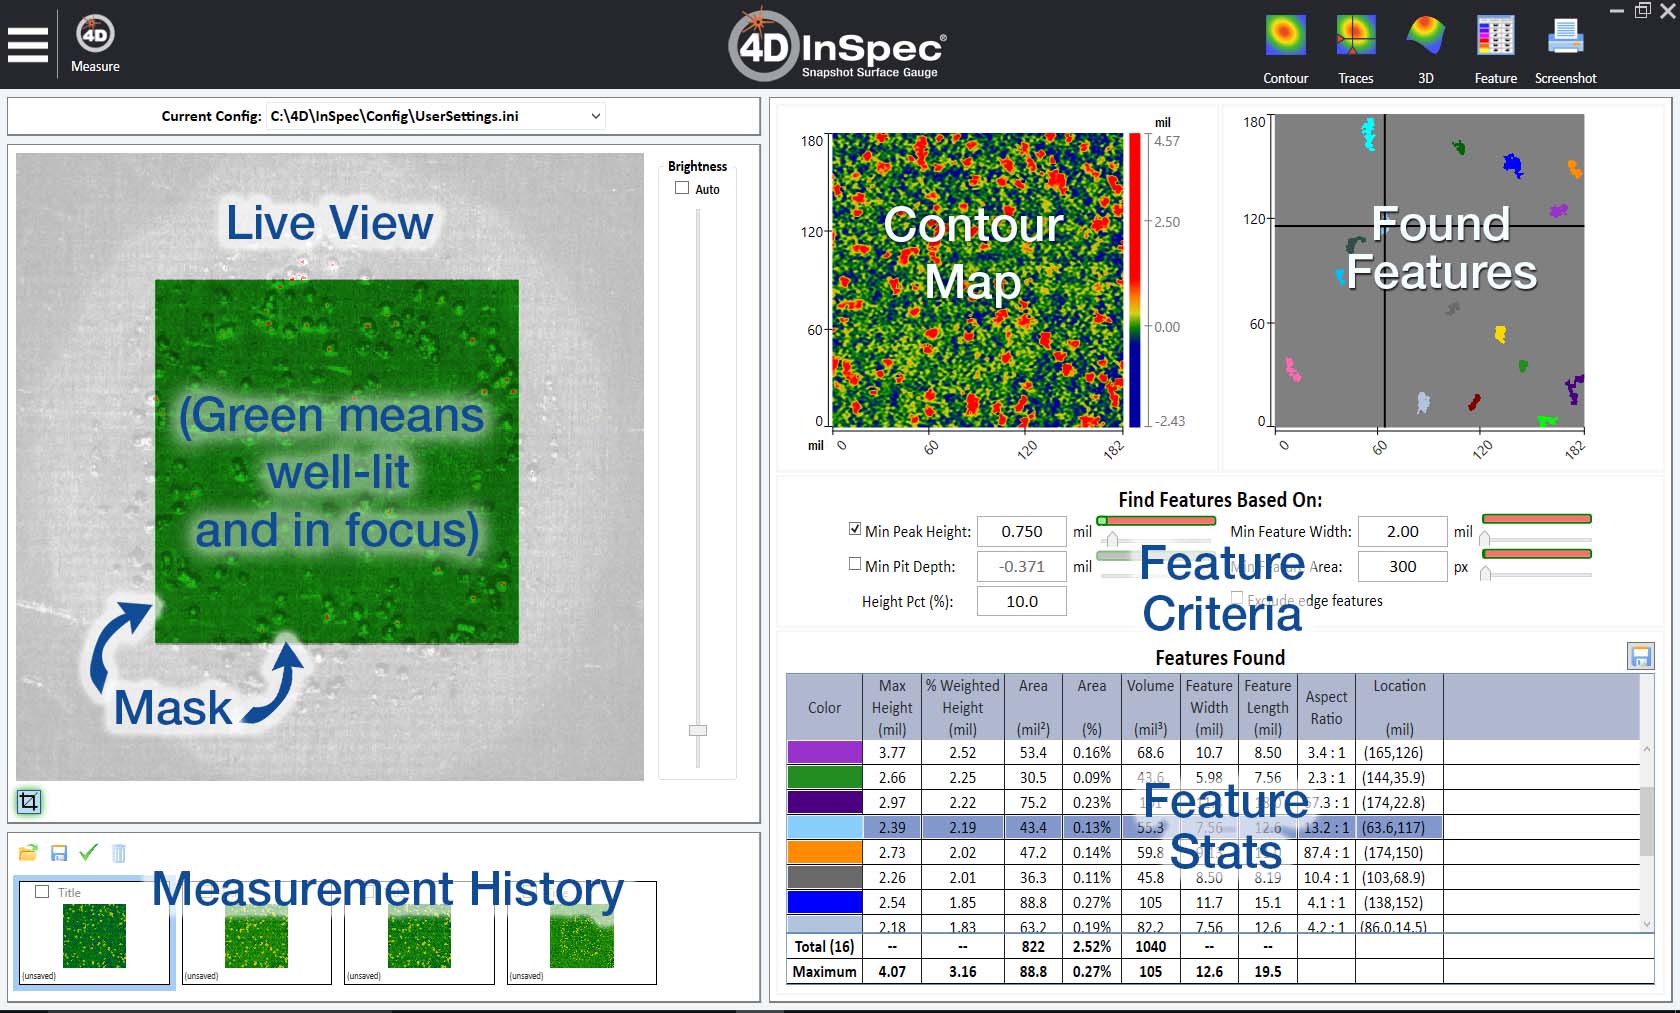 |
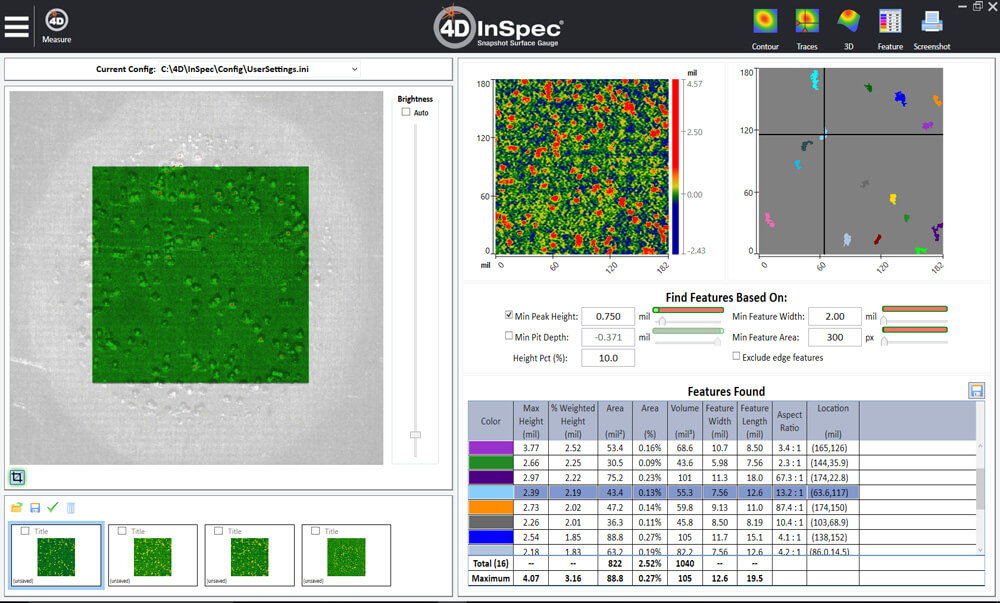
In Feature Analysis view, you can enter your feature criteria—such as minimum and maximum heights, pit depths and the minimum area of a feature—to let the software find and quantify your features. The statistical results are displayed in the Features Found table, and color coded in the Found Features plot. Features outside of your criteria are hidden.

The 4D InSpec uses Polarized Structured Light, a measurement technique with vertical resolution better than 2 micrometers over a 2.5mm vertical range. The 4D InSpec therefore provides sufficient resolution for gauge-capable measurement of chamfers on most precision machined parts, which typically require tolerances of 150-300 micrometers.
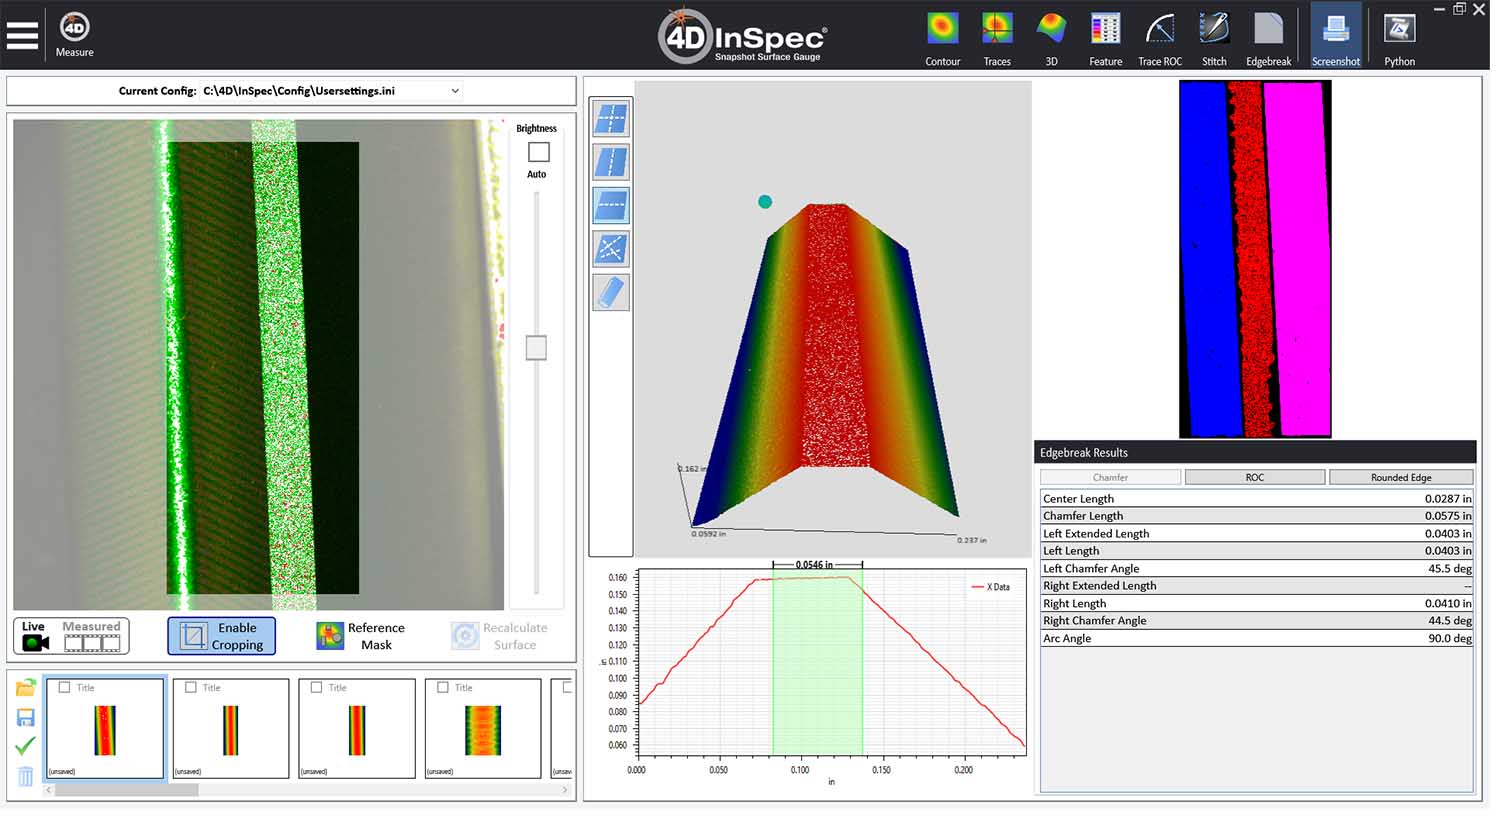
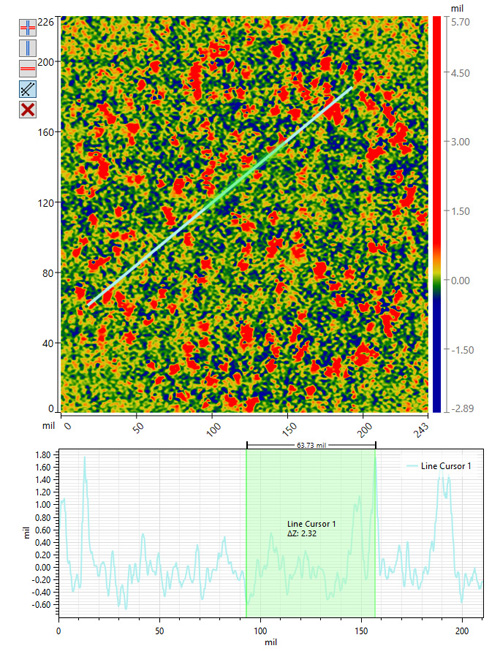
You can also show a 2D or 3D plot of the area, full screen. On a 2D or 3D plot, you can draw profiles in the X or Y direction, or using an arbitrary segment that you draw by clicking and dragging.
In the space below the area plot, the cross-sectional line profile is plotted. Within the profile, click and drag to obtain segment information, such as the change in height between the beginning and end points of the sub-segment, and the distance laterally between the end points.
Specifcations
| Basic Specification |
| |
| Acquisition | Instantaneous, non-contact 3D surface measurement | |
| Measurable Range | Defects and features 0.0002–0.1 in (5 µm–2.5 mm) deep/tall | |
| Field of View ( module) | 0.3 x 0.3 in (7.7 x 7.7 mm) | |
| Lateral Sampling | 0.00016 in (4.0 µm) | |
| Vertical Resolution | 0.00016 in (4.0 µm) | |
| Mounting | Handheld, microscope stand, or robotic mounting possible | |
| Standoff Distance | 1.4 in (35 mm) | |
| Software | ||
| Analysis | 4D InSpec control and analysis software | |
| Measurement Modes | Single snapshot; enhanced resolution multi-snapshot mode | |
| Defect Detection | Identify features based on height, area, and width thresholds | |
| Defect Calculations | Max height, volume, area, max slope, density, aspect ratio, XY location | |
| Data Displays | Contour, 3D, XY slice with arbitrary cursors, radius of curvature | |
| Data Output | Tabular feature analysis statistics with 3D surface maps | |
| Data Masking | Masking based on signal to noise ratio; rectangular ROI masks for analysis | |
| Export | XYZ point cloud, CSV fle, or 2D Trace | |
| Computer | Multiple options including all-in-one touchscreen, laptop, or customer-supplied | |
| Electrical/Mechanical | ||
| Dimensions | 11 x 2 x 2.8 inches (280 mm x 50 mm x 70 mm) | |
| Light Source | 450 nm LED with 100,000 hour MTBF | |
| Sensor | 1900x1900 pixels, 12-bit scientifc CMOS camera | |
| Power Consumption | <10W 4D InSpec unit; <250 W with computer system @ 120 VAC | |
| Weight | < 2 lbs (0.8 kg) instrument only | |
| Cable Length | 10 ft (3 m ); longer length optional | |
| Operating Temperature | 50–86° F (10–30° C) | |
| Operating Humidity | < 98% non-condensing | |
| Shock resistance | 150G (1*10-8/kg/s2) | |
| Performance | ||
| Noise Floor | < 0.00016 inches (4.0 µm) | |
| Vertical Repeatability | < 0.00001 inches (0.15 µm) | |
| Step Height Accuracy | < 1% | |
| Depth of Focus | > 0.10 inches (2.5 mm) | |
| Minimum Part Roughness | 2.5 µin (60 nm) R | |
4D InSpec Options and Accessories
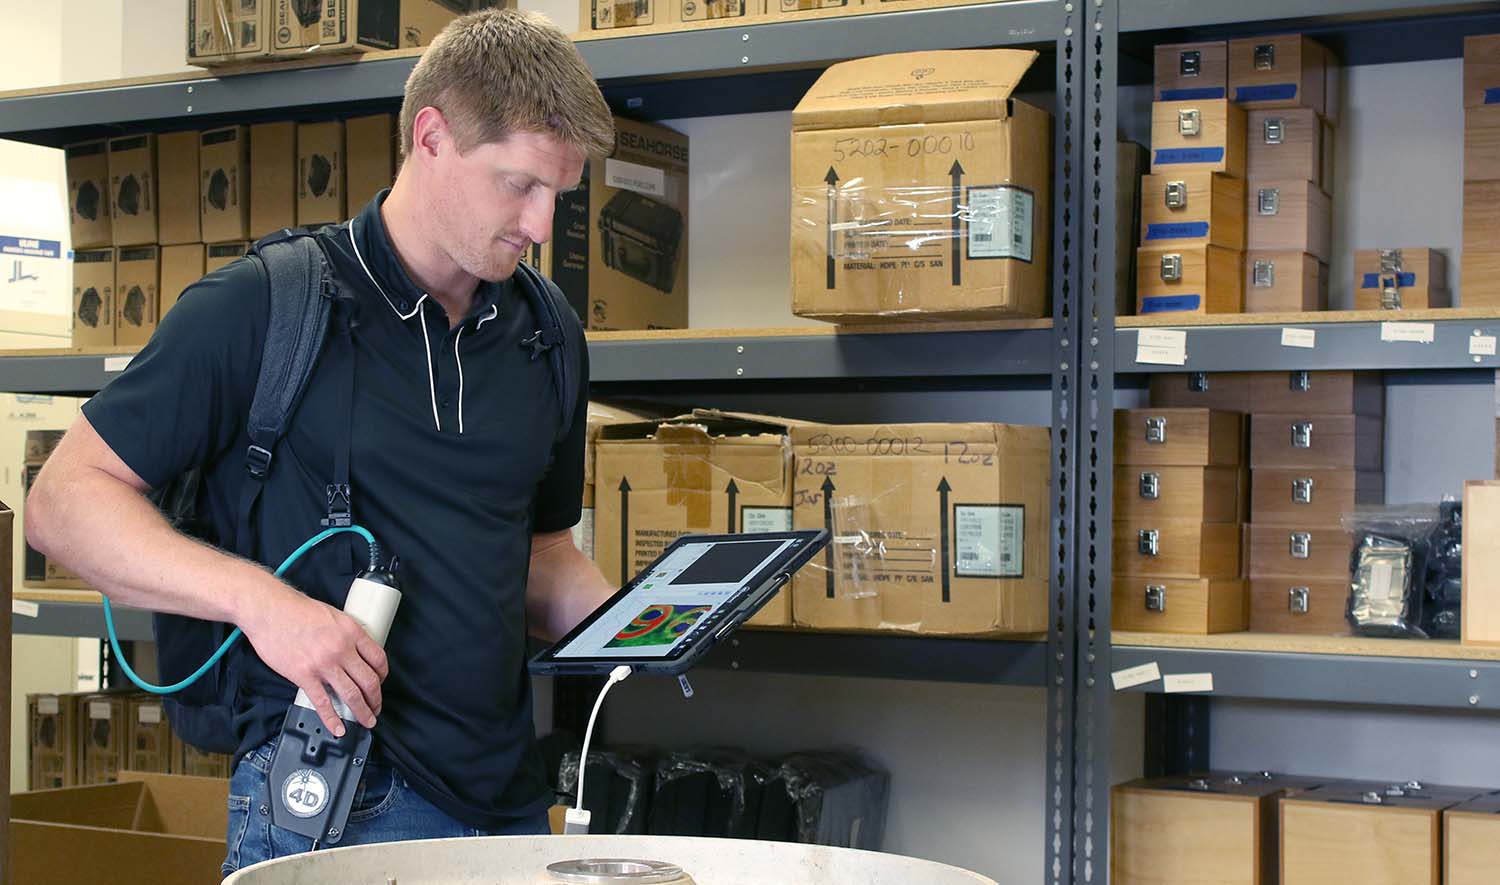
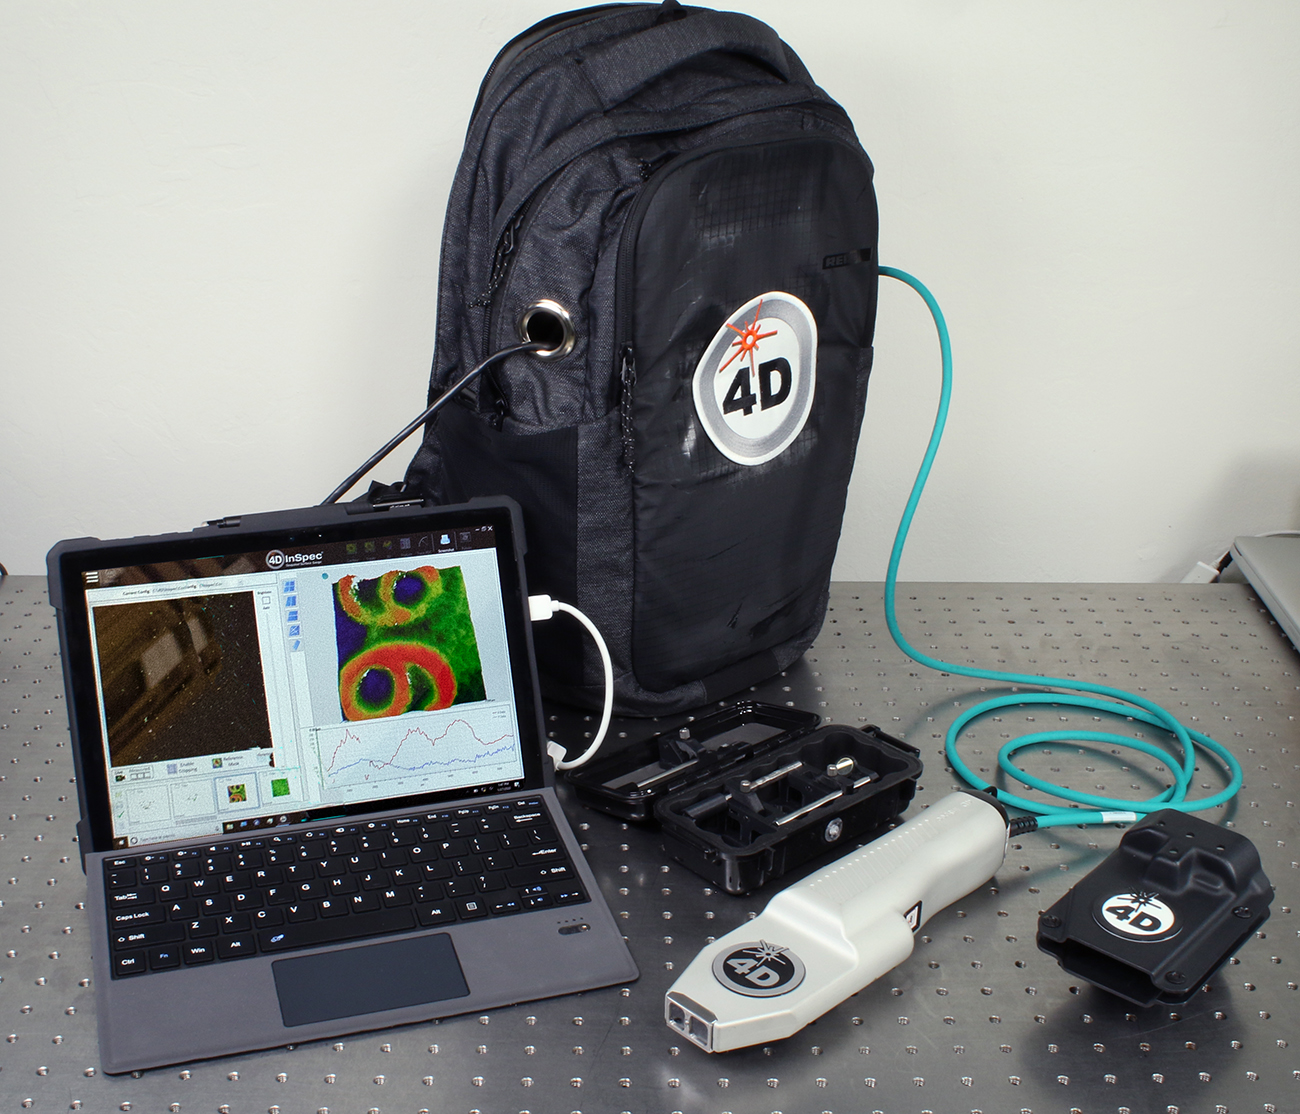
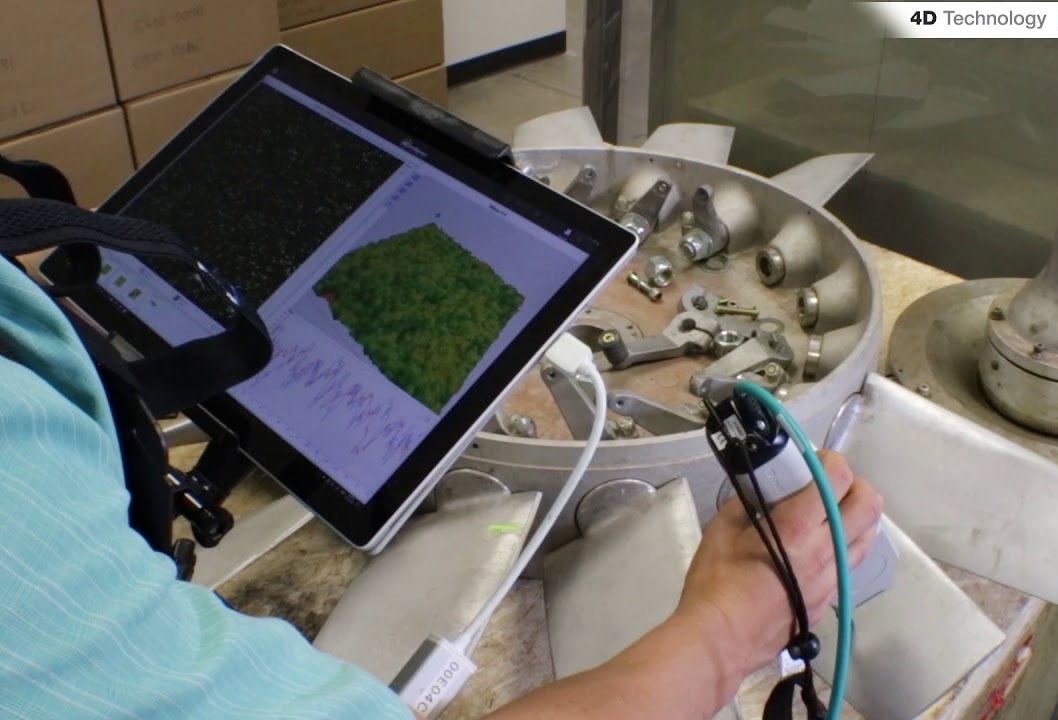
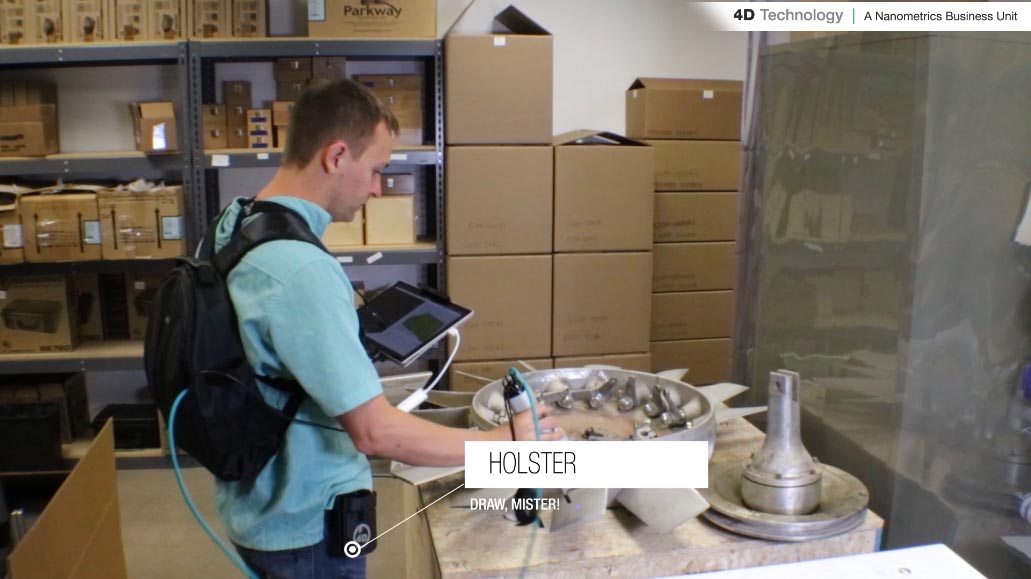
Backpack trekker kitImagine taking an 3D measurement of a rivet on an airplane wing, a helicopter on the deck of a ship, or the flanges at the top of a wind generation tower. Put on a backpack and climb stairs or a ladder. The light pack—less than 15 pounds (7 kg)—means you have low stress. You walk to your measurement location. You don’t need to rush, the portable power supplies last for a full workday. Uncover the rugged tablet and slip your hand in the grip-strap. Pull the 4D InSpec from the holster on your belt. Point the 4D InSpec at the area in question, using the tablet to confirm you’re in focus, click the button and your measurement is saved. You have a 3D measurement in a second or two — no harder than taking a picture with a cell phone. Aviation users can walk out on-wing for inspections. Need to get between some turbine blades? Use the included fold-mirror kit to look at the side you can’t see. . Back at your desk, transfer the files to a permanent storage location, pull up the measurements and do your analysis, double check the work or send the files on with your report. |
|
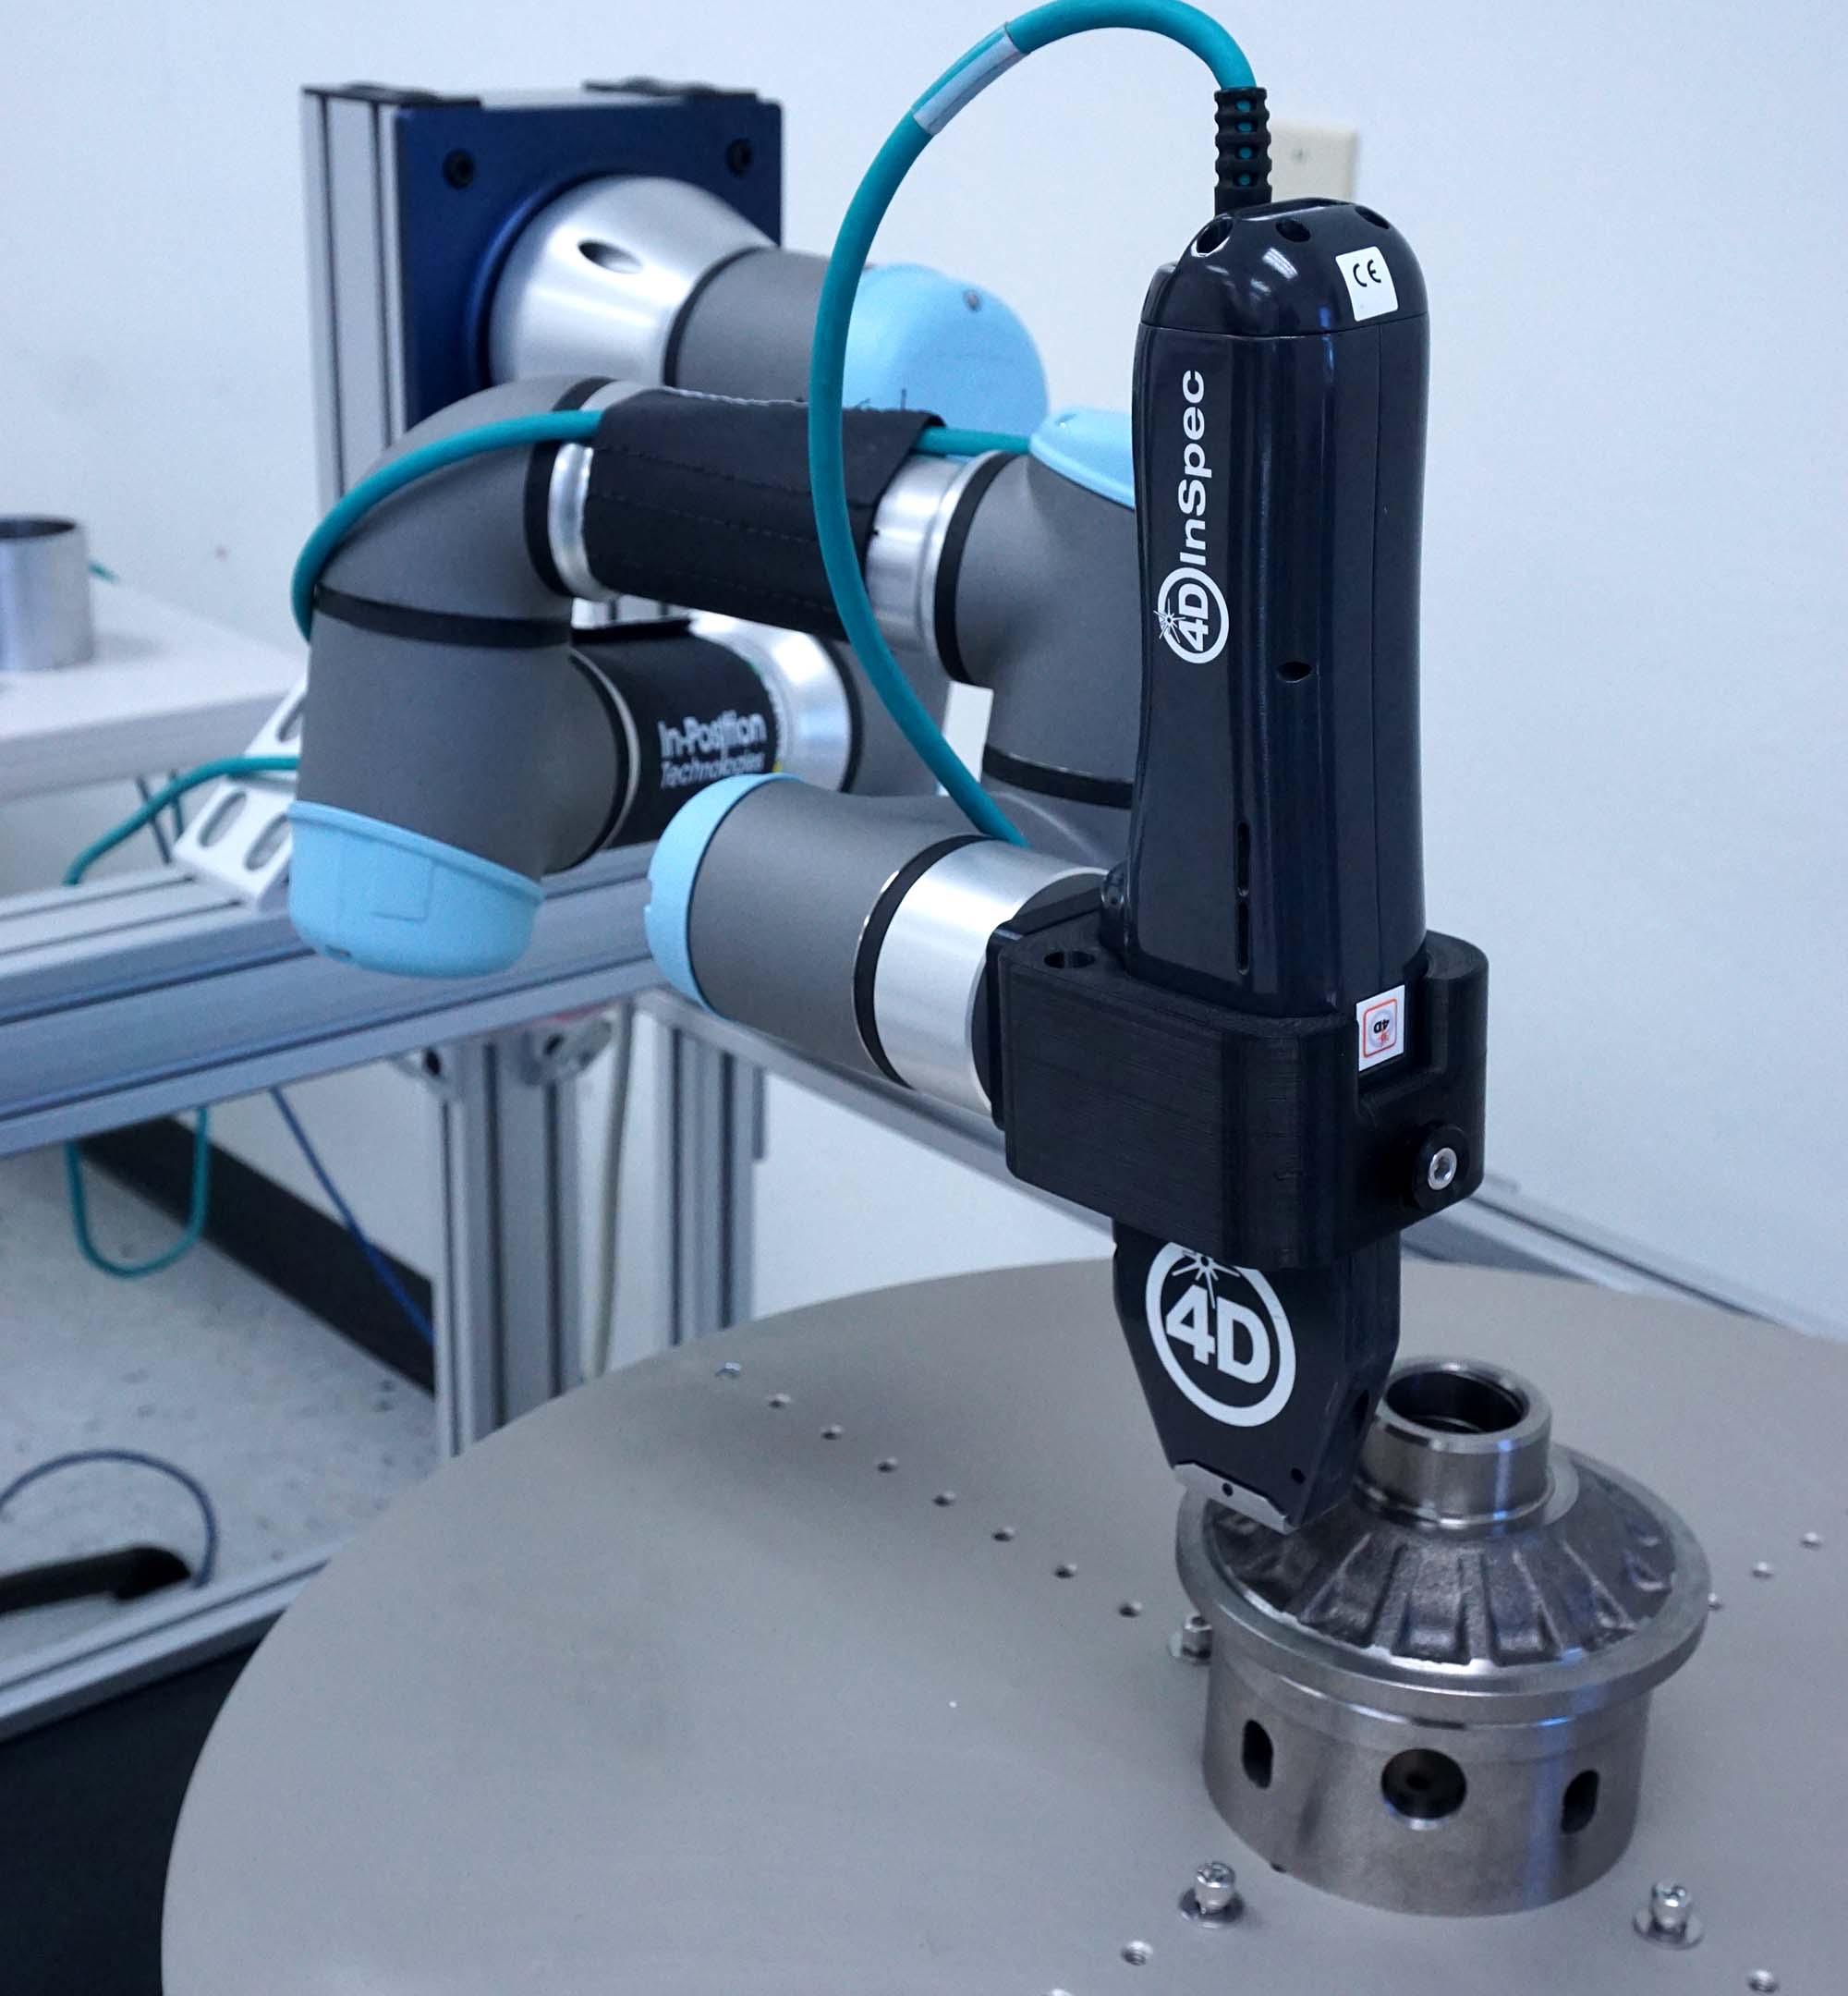 | Robotic AutomationImprove measurement repeatability by adding robotic automation to the 4D InSpec (or XL). The UR Robot is natively integrated into the analysis software, so you can be operating and training your robot in minutes. The built-in API helps you edit connections to other robots, rotary tables and rotary stages quickly. With robot handling and triggering, it’s possible to make many routine measurements quickly. Some customers, who have been sub-sampling parts for years, are now in a position to measure 100% of parts with 4D InSpec on a robot. |
Portable cartThe portable cart provides a means of taking your inspection gauge around the shop floor, as shown on the left. The portable cart holds the all-in-one computer on a swivel arm, as well as the 4D InSpec and its stand on the adjustable shelf. Adjust the height: Raise the monitor and shelf for standing use, or lower the monitor when measuring a part that is sitting on the floor. The articulated arm is easily positioned for use in tight quarters and to reduce glare in factory lighting conditions. The cart can also securely hold the 500W power supply accessory. | 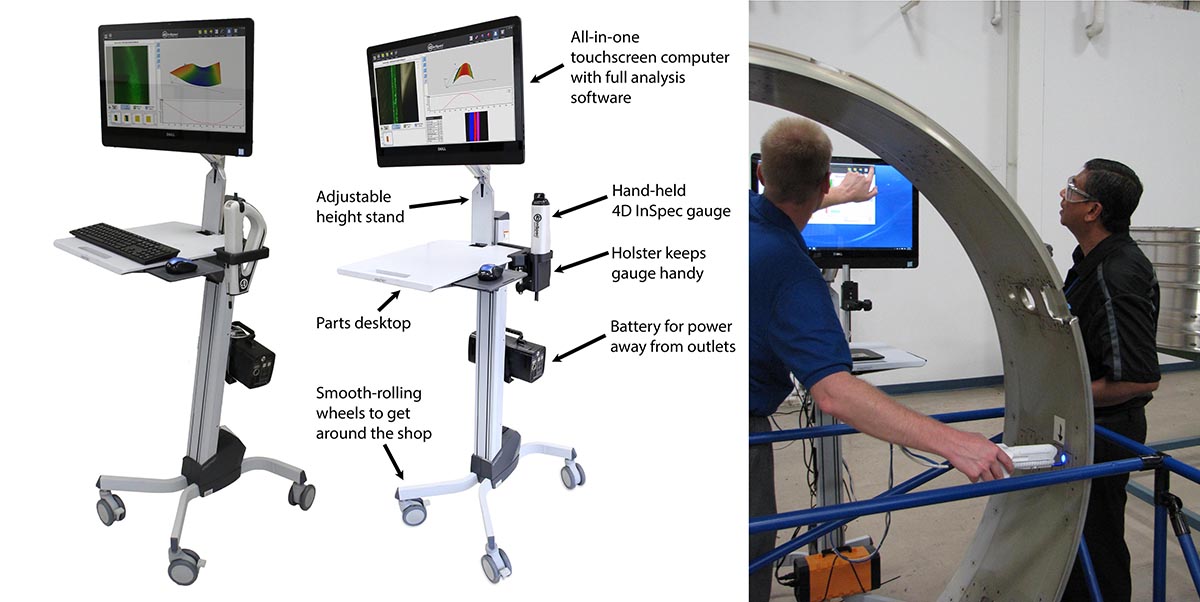 |
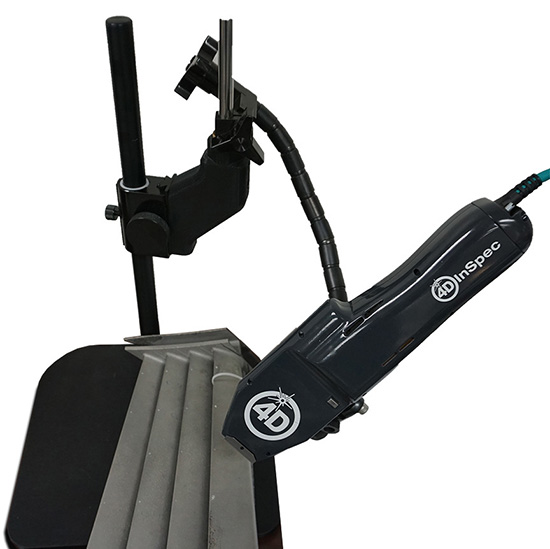 | Flexible Mounting ArmThe Flexible Mounting Arm attaches to the main post of the workstation stand, which is included with the 4D InSpec. The 560 mm (22 in) long arm lets you position the 4D InSpec at any orientation within approx. 150 mm (12 in) of the vertical post. It includes a fine focus adjustment to help you obtain and hold good focus and signal strength for any surface, with no part fixturing required. |
Fold Mirror KitPerfect for measuring larger bores or difficult to reach sidewalls, fold mirrors are used instead of the standard alignment aid to measure difficult-to-access areas, such as the sides of pipes, the surface between turbine blades, the area under a lip or flange, etc. The kit includes four mirrors:
All fold mirrors are mounted at 45 degrees to bend the test beam 90 degrees. The standoff distance is set for full compatibility with the 4D InSpec. A hard shell carrying case is included. | 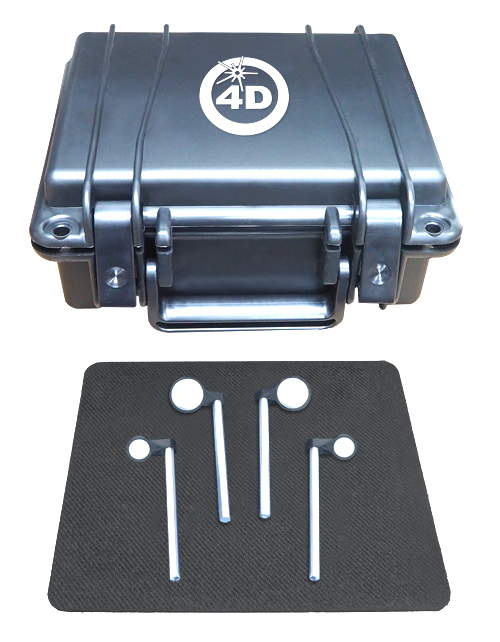 |
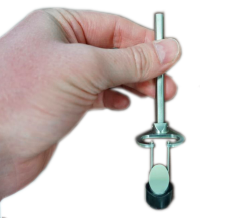 | Small Bore MirrorThis fold mirror lets you inspect deep into 3/4 in or larger diameter holes. 4D can also design and manufacture custom alignment fixtures, fold mirrors and measurement aids to meet the requirements of your particular application. |
500W Portable Uninterruptable Power Supply (UPS)This battery power supply runs the 4D InSpec and computer for approximately 8 hours of standard use, or 6 hours of high-intensity use, without a need to plug into a wall outlet. The power supply provides improved portability for use throughout the shop floor. The power supply securely mounts to the LCD cart and detaches with a single thumbscrew. It can be carried in a backpack for walking portability kits. Buy multiple power supplies, so that one can be charging while the other is in use, allowing outlet-free operation of the 4D InSpec over multiple shifts. | 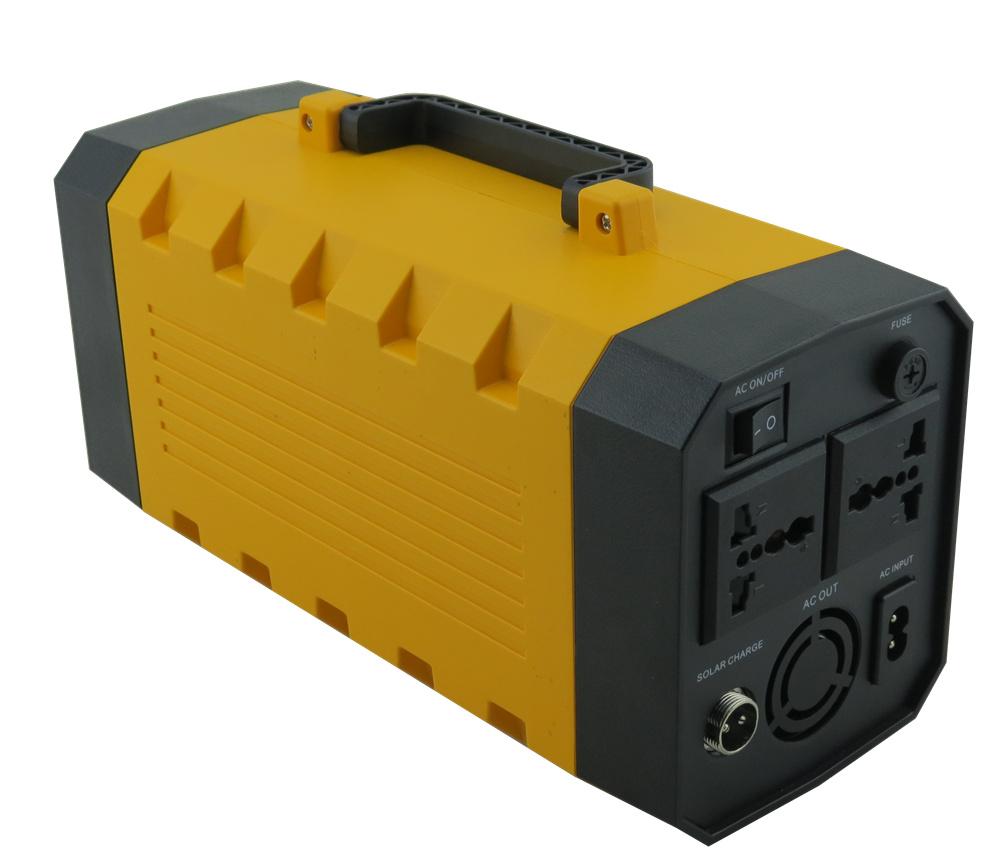 |
Calibration Standard
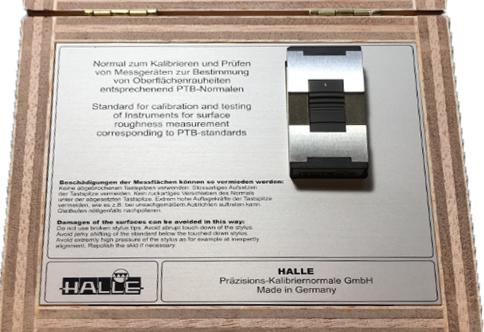
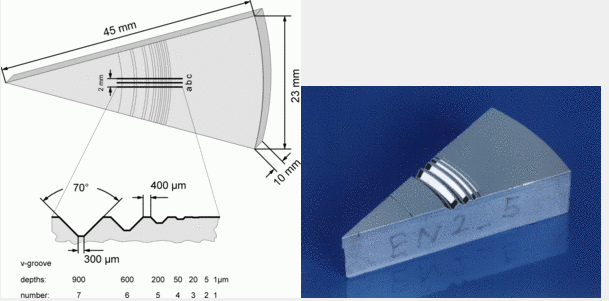
4D Technology worked with PTB and HALLE Präzisions-Kalibriernormale GmbH to create a depth standard for vertical calibration and verification of the 4D InSpec Surface Gauge. The standard includes grooves from 1 um to 900 µm deep. 4D uses the 100, 200, 600 and 900 µm grooves for 4D InSpec calibration. The geometry of the standards is shown below. Each standard comes complete with a storage box as shown.
This standard is identical to that described above, except the four grooves used for 4D InSpec calibration are certified using the Carl Zeiss accreditation service, providing greater accuracy for 4D InSpec calibration. This standard is recommended for QC departments that require the highest accuracy standards. The uncertainty of the grooves will be:
- 100 µm groove = 80 nm
- 200 µm groove = 100 nm
- 600 µm groove = 100 nm
- 900 µm groove = 180 nm
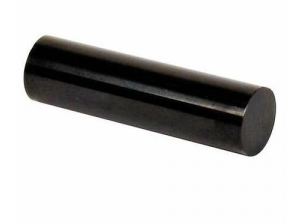
The lateral calibration standard used for the 4D InSpec is a 1.000” diameter Steel pin gauge with Black Guard coating. The pin gauge is class ZZ, with a tolerance of ± 0.0002 in (0.005 mm). The Radius of Curvature calculation can be used in the InSpec software can be used to verify the lateral calibration of the InSpec, which when properly calibrated will give the radius of this gauge as 0.5 in. The pin gauge has a 10 microinch (25 nm) finish, is 2 in long, and comes with a certificate of accuracy.
Được cấp bởi các thương hàng đầu trên thế giới như Carl Zeiss, PTB & HALLE Präzisions-Kalibriernormale GmbH.
 |  |  |
USB Foot Pedal4D InSpec measurements can always be initiated using either the trigger button on the measurement head or the software controls on the touchscreen. The USB foot pedal provides a third, hands-free option to initiate a measurement when measuring difficult geometries or large parts. All three methods are available at all times, providing maximum flexibility to easily achieve good surface defect measurements. | 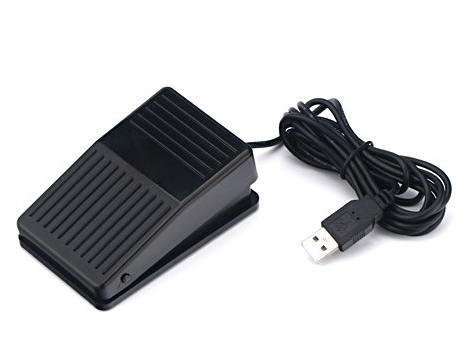 |
 | Stand-Alone Software LicenseThis option lets you install an additional copy of the 4D Inspec software on a computer which is not connected to the 4D InSpec instrument. The extra copy makes it possible to load, analyze and modify measurements from the instrument at the convenience of a separate Windows® 10-based computer, while the instrument continues to be used. |
Remote Access SoftwareThis option enables Windows Communication Foundation (WCF) functionality with the 4D InSpec software such that the Surface Gauge may be controlled remotely via a user-written application. This functionality makes it possible, for example, to integrate the 4D InSpec into an automated platform. With the remote access software package you can trigger such actions as grabbing a live camera image, opening a configuration file, taking a measurement, performing the Feature Analysis calculations, or other key operations that normally happen via the 4D InSpec’s own graphical user interface. |  |

